Developer | Fall'18
In product design, "Design Thinking" is an approach to critical thinking and creative problem solving (previously discussed with Nikol in this lesson). As a result, it is important for designers to be iterative when formalising and evaluating the best solutions for their problem or target users.
Prototyping is one of the crucial parts of this process: it can range anywhere from low to high fidelity, as long as its main purpose focuses on validating concepts and revealing necessary refinements. In LavaLab, our designers go through various stages of "proof-of-concepts" to present the maximum value for their users on Demo Day.
In this discussion with LavaLab alumni Aidan, we will introduce you to the general concept of Prototyping, the common mistakes that designers make, and a plethora of resources to get you started as a maker!
(Editor's Note: The following discussion has been edited and condensed.)

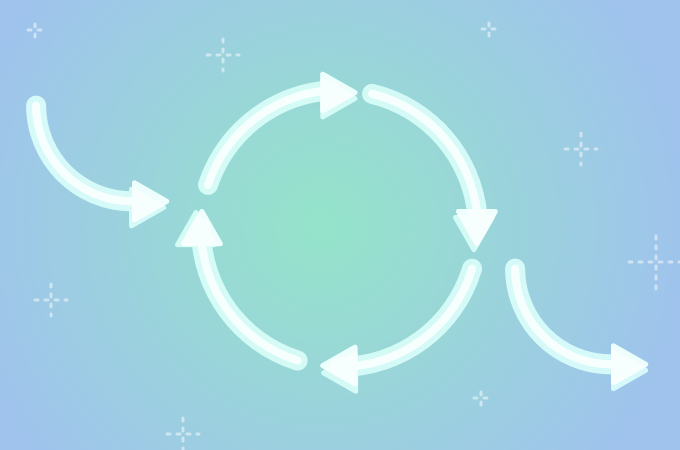
The main goal of prototyping is in its process, rather than the demonstration of a final product. When we frame it in this cycle, prototyping becomes a practice in experimentation, visual discussion, and constant feedback. This collaborative loop therefore leads to better, faster design. Its cycle is best presented in three stages:
1) Rapid Prototyping
This buzzword simply means creating a proof-of-concept of our solution. As designers, this approach helps us see if the problem truly exists: for example, more vague or basic prototypes help us make sense of our direction. But it also helps us see if our possible solution(s) will actually work: in this case, higher fidelity prototypes leads us to...
2) Reviewing
By having users/stakeholders give feedback on what’s working and what’s not, this stage helps us validate an idea or belief we may have.
3) Refining
Finally, it is important to keep in mind that prototyping is done to broaden our understanding! Identifying areas that need to be refined or clarified (based on feedback) will help us feel out the next steps.

Some designers assume that the goal of prototyping is to facilitate the understanding of the product for others. Basically, they hope the prototype will tell the PMs, developers, and marketers what the product is. But that is not what prototyping is about. Rather, prototyping should be used by designers or engineers to facilitate the development of an idea.
If the goal was to facilitate and communicate a concept, then modeling would be the method to achieve this goal instead. Consider the use of the term "model": we can have statistical models, model cars, clay models, ...etc. These examples only focus on presenting a visual presence or functionality to, let's say, a business panel after the concept has been fully fleshed out.
Whereas the term "prototype" refers the unrefined, and we should proceed without the pre-notion of demonstrating it to an audience to maintain the spirit of revision. While many designers may use these two terms interchangeably, the differentiation provides clarity to the more collaborative and iterative aspect of prototyping.
Ultimately, the stage of rapid prototyping is for the designer, and the model is for the world. Therefore, we should prototype with whatever we are most comfortable with.
However, we can easily get lost in the large array of prototyping techniques (especially for physical products), so it's important to choose the one that fits our particular goal in that iteration. Plus, the more we prototype, the more we will gradually develop a repertoire of tools we prefer. This is especially true if we are a “maker” and enjoy tinkering.
For starters, here is a list of techniques with useful resources we recommend and have utilised for past projects:
Paper
For digital products, paper prototyping is the most foundational technique. Low fidelity sketches, "card sorting", and paper screenshots are the cheapest and easiest way to brainstorm and shape concepts for apps in early-stage development. Similarly, we can apply this technique for hardware products with cardboard, foam, or recycled material prototypes.


CAD
"Computer-aided design" software can help us create higher quality models, documentation, and even a database for manufacturing our hardware products down the line. For beginners, we highly recommend learning Fusion 360 first, a cloud-based platform that is free for students!


3D Printing
If lucky enough, getting our hands on a 3D printer can provide a lot more accuracy to our higher fidelity prototypes and decrease risk in production down the line. The current additive technology of 3D printing is so advanced that our functional prototypes can be produced in a matter of hours and in a range of plastics and metals.

CNC Milling/Routing
Compared to 3D printing, "computer-numerical control" milling uses rotary cutters that can provide greater dimensional accuracy to larger range of materials including wood. So due to its subtractive nature, CNC can provide more specific surface finishes and mechanical properties. However, these machines are more rare to come across.

Wood Working
Perhaps that high school wood shop can finally come to use? Wooden prototypes, especially for larger projects, are a boon for user testing if we have the materials and tools.

Basic Electronics
In the product world, hardware with embedded software ("firmware") are ever-so relevant in creating effective solutions. Tools like Arduino and Raspberry Pi are especially easy-to-learn to build interactive electronic objects without any prior knowledge in electronics needed! In our very own workshop, LavaLab alum Ishan Shah teaches some introductory knowledge to hardware design and theory through the use of a Raspberry Pi.

Like our own reading lists, a mix of general and hyper-specific books can be extremely beneficial to our design exploration. Most of the resources above are fairly practical (the point of prototyping), but theory and research is just as crucial for us to conceptualize products that can spark emotion and create harmony for its users and its environment.


.png)